Initial Setup Wizard (Quick Configuration)
The Havenlytics Setup Wizard is the fastest way to configure your WordPress Real Estate Website after installing the Havenlytics WordPress Real Estate Plugin. Designed with a modern step-by-step onboarding experience, the wizard helps you configure essential settings, import professional demo properties, and prepare your website in just a few minutes.
Instead of manually creating listings and configuring taxonomies, Havenlytics automatically generates a complete real estate environment with demo properties, agents, agencies, media, maps, and property data—allowing you to start customizing your website immediately.
We recommend completing the Setup Wizard after activation. However, if needed, you can skip the process and configure everything manually later.
What the Setup Wizard Configures
The Setup Wizard automatically prepares your website by configuring:
- Property Departments & Taxonomies
- Interactive Map Settings
- Demo Property Media
- Property Import Preferences
- Demo Agents & Agencies
- Property Assignments
- Cache Optimization
- Demo Property Listings
Once completed, your website is ready for customization.
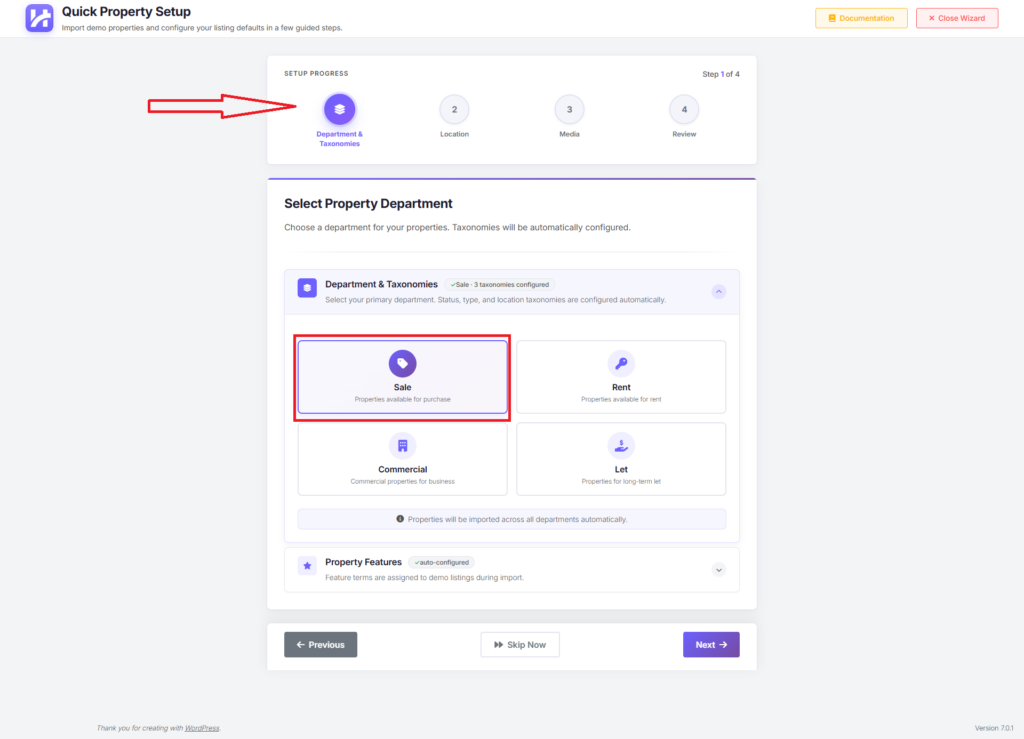
Step 1: Department & Taxonomies
Choose your primary property department to organize your listings. Havenlytics automatically configures the required taxonomies for the selected department, making it easy to manage different property categories.
Available departments include:
- Sale
- Rent
- Commercial
- Let
Property features and demo taxonomy terms are automatically created during the import process, so no additional configuration is required.
Step 2: Configure Map Location
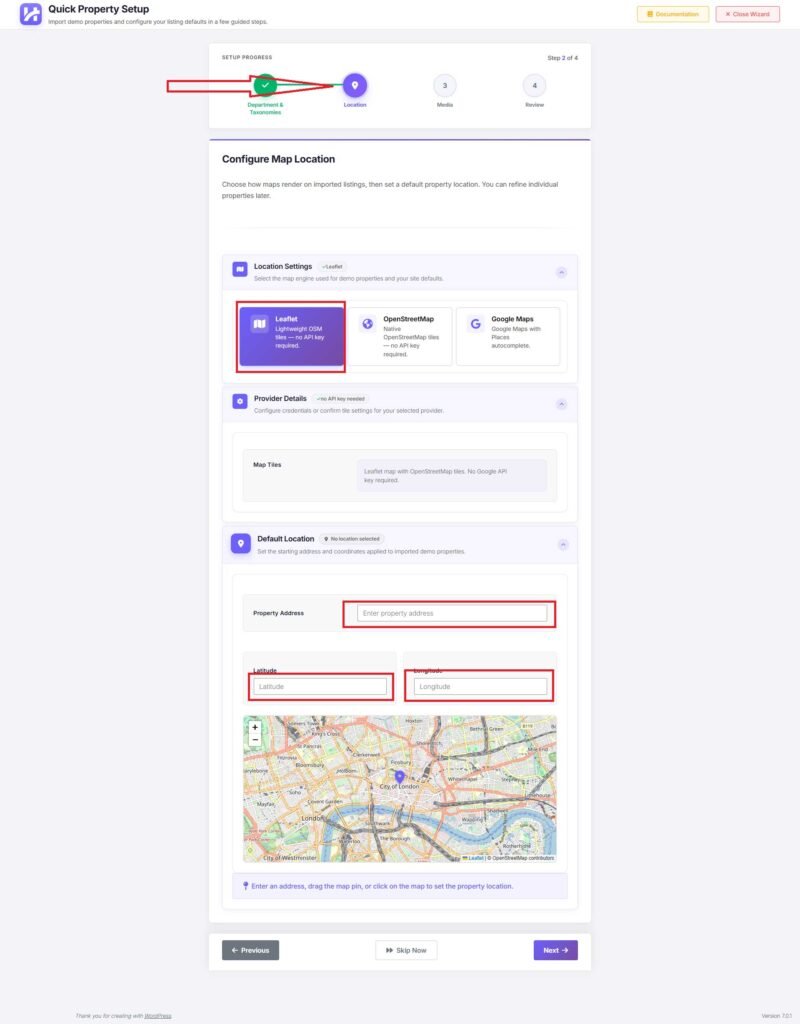
The Location step allows you to configure how maps are displayed throughout your real estate website.
Choose Your Preferred Map Provider
Havenlytics supports multiple mapping solutions:
- Leaflet (Recommended – No API Key Required)
- OpenStreetMap
- Google Maps (Requires Google Maps API Key)
After selecting your preferred provider, simply enter your default property address or choose a location directly on the interactive map.
You can:
- Search by address
- Drag the map marker
- Click anywhere on the map
- Automatically generate latitude and longitude
These settings become the default location for imported demo properties and can be edited individually later.
Step 3: Property Media
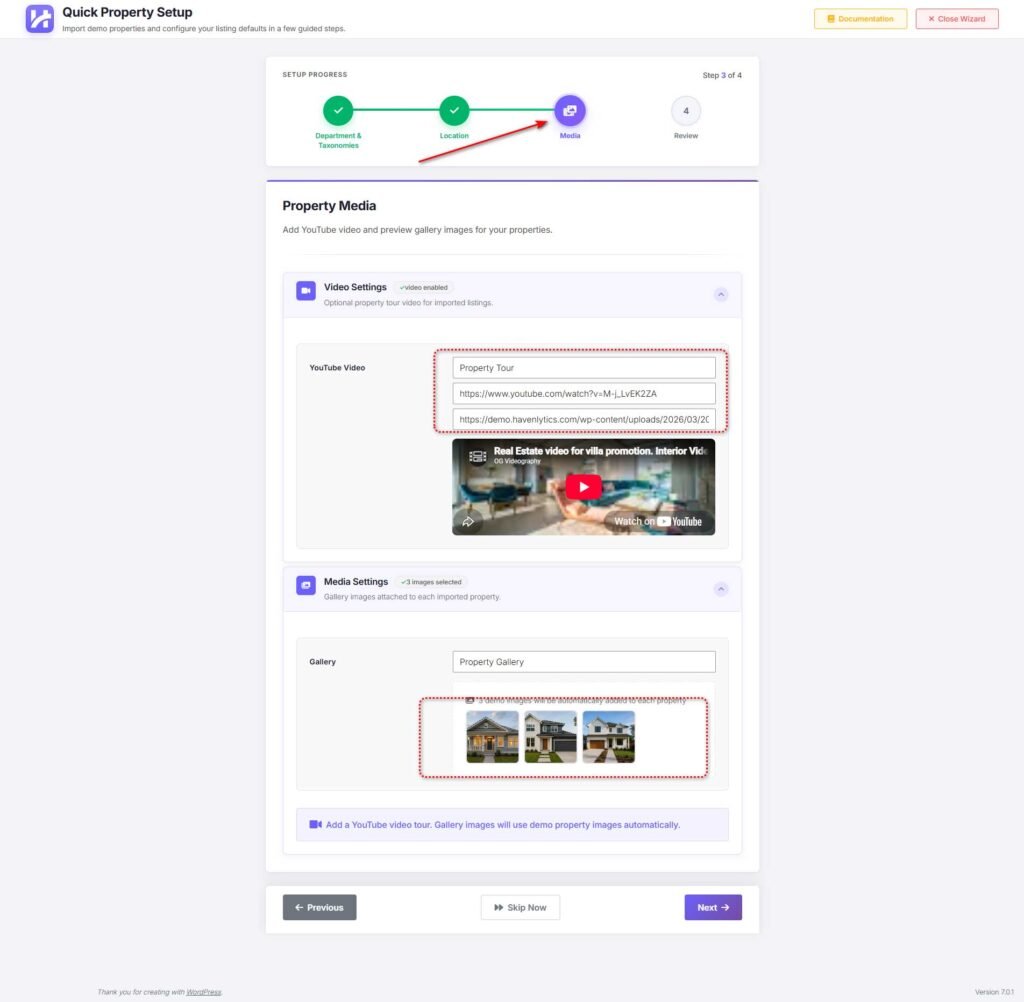
Create more engaging property listings by importing professional demo media.
YouTube Property Tour
Add a YouTube property tour that will be attached to imported demo listings.
Supported options include:
- Video Title
- YouTube URL
- Automatic Thumbnail Preview
Property Gallery
Each imported property includes a professional image gallery with demo property images, helping your website look complete immediately after setup.
You can replace these images with your own at any time.
Step 4: Import Preferences
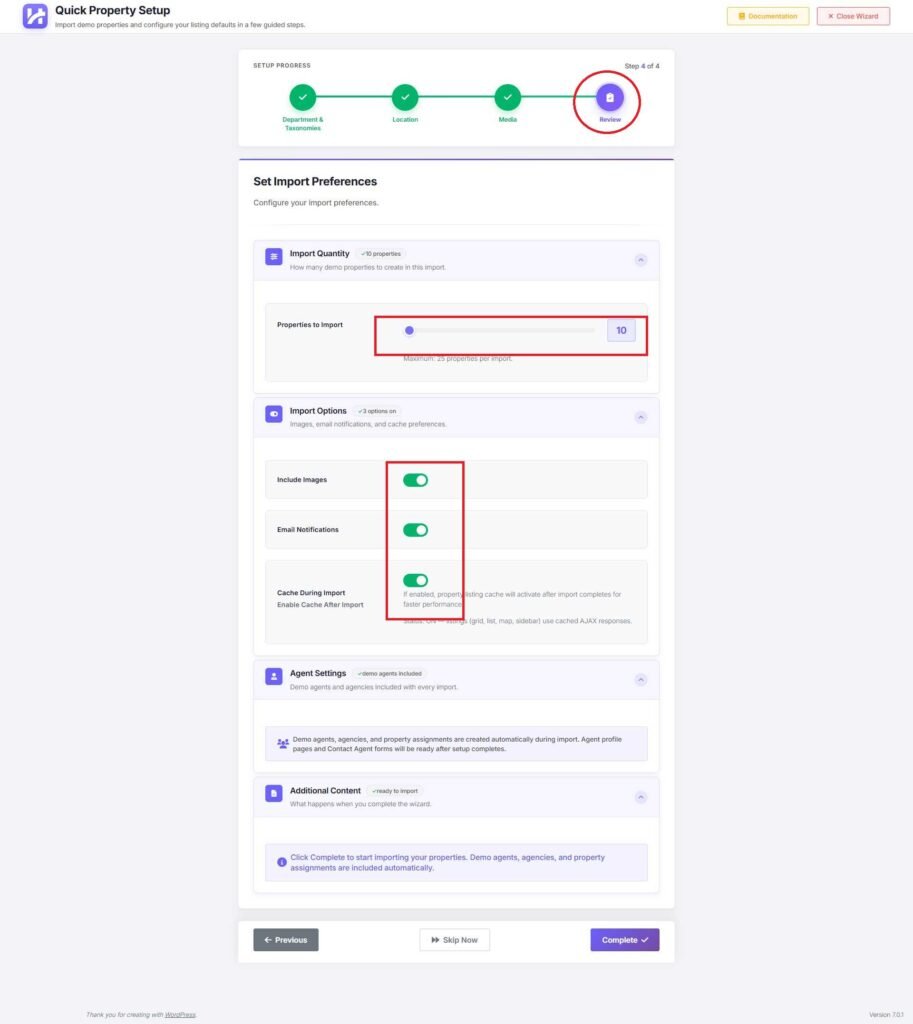
Before importing demo content, configure how Havenlytics should generate your website.
Property Quantity
Select how many demo properties you want to import.
- Minimum: 10 Properties
- Maximum: 25 Properties
Import Options
Customize your import using built-in options:
- Include Property Images
- Enable Email Notifications
- Enable Cache After Import
Enabling cache after import improves the performance of property listings, search results, map views, and AJAX requests immediately after setup.
Demo Agents & Agencies
Havenlytics automatically creates:
- Professional Agent Profiles
- Real Estate Agencies
- Property Assignments
- Contact Agent Pages
This allows you to experience the complete real estate workflow without manually creating demo content.
When you’re ready, click Complete to begin the import process.
Import Progress
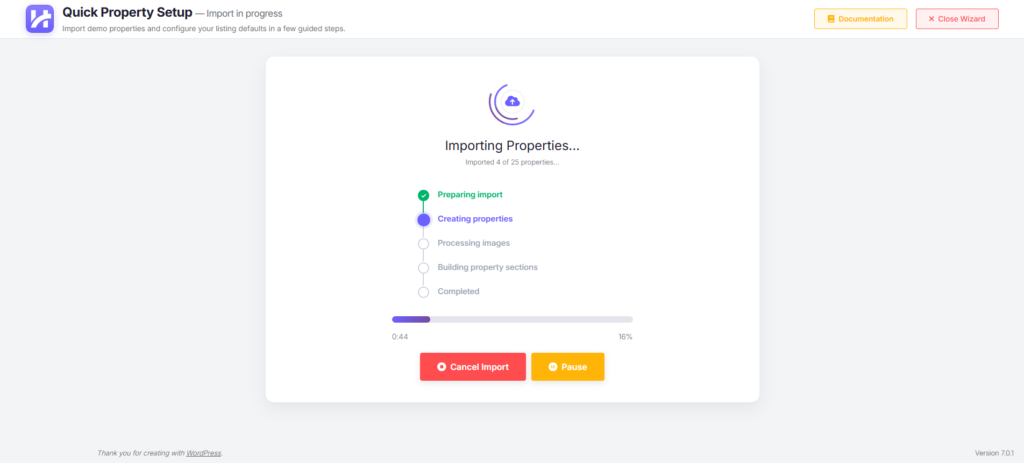
During the import process, Havenlytics displays a live progress screen showing each stage of the setup.
The wizard automatically performs:
- Preparing Import
- Creating Properties
- Processing Images
- Building Property Sections
- Completing the Setup
Simply wait until the process reaches 100%. The wizard will notify you once your demo website is ready.
After Import
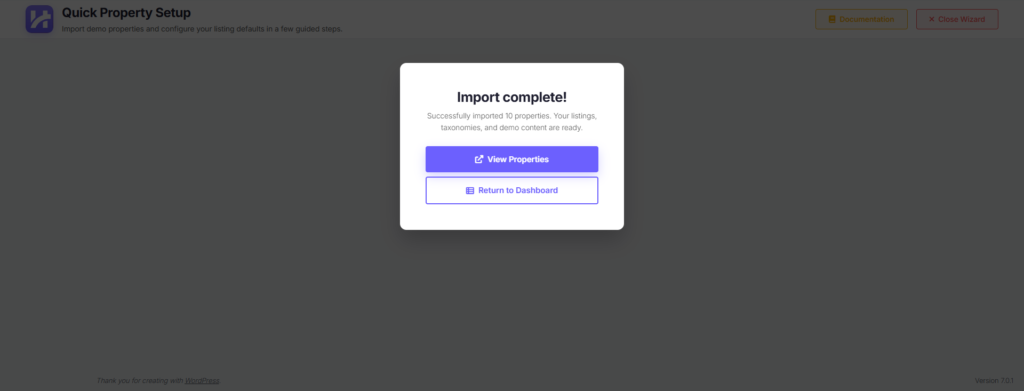
After the import finishes, you can immediately begin exploring your new real estate website.
Your website will include:
- Demo Property Listings
- Property Categories
- Property Features
- Agents
- Agencies
- Interactive Maps
- Property Images
- Video Tours
- Search Filters
- Contact Agent Forms
Click View Properties to review the imported listings and begin customizing them with your own content.
Final Step: Refresh Permalinks
To ensure all property pages, archives, and custom URLs work correctly:
- Go to WordPress Dashboard → Settings → Permalinks
- Select Post Name (if it is not already selected)
- Click Save Changes
Refreshing permalinks updates WordPress rewrite rules and ensures your property pages, taxonomies, and search URLs function correctly.
Tips
- Complete the Setup Wizard before adding your own listings.
- Use Leaflet or OpenStreetMap if you don’t have a Google Maps API key.
- Import 10 properties for testing or 25 properties for a complete demo website.
- Enable cache after import for the best frontend performance.
- Demo content can be edited or removed at any time.
Frequently Asked Questions
Can I skip the Setup Wizard?
Yes. You can skip the wizard and configure Havenlytics manually later.
Can I run the Setup Wizard again?
Yes. The Setup Wizard can be relaunched whenever you need to import fresh demo content or reconfigure your website.
Will my existing properties be deleted?
No. The Setup Wizard imports new demo content without removing your existing property listings.
Can I replace the demo content?
Absolutely. Every imported property, agent, agency, image, and video can be edited or removed from the WordPress dashboard.