Building a real estate website used to be a choice between two bad options: pay an agency thousands for a custom build, or rent a templated site from a platform that owns your data and charges you monthly forever.
WordPress changed that math. It powers a large share of the web, it’s free and open source, and with the right real estate stack on top, it can help you build a professional website at a fraction of the cost of many custom development projects — while keeping control of your site and data.
This guide walks through the entire process, from an empty hosting account to a launched site with listings, search, agent profiles, and analytics. It’s written for beginners: agents building their own site, and freelancers building their first real estate project for a client. No code required.
We’ll use Havenlytics — our WordPress real estate platform — as the worked example throughout, but the structure of the process applies whatever tools you choose. Teach first, sell second; that’s the house rule.
Here’s the full route:
- Get hosting and install WordPress
- Choose your stack: theme and real estate plugin
- Install your real estate platform and run the setup wizard
- Plan your pages
- Model your inventory with taxonomies
- Add your first listings
- Design your listing pages
- Build your property search
- Add agents and structure your team
- Assemble your pages
- Run the pre-launch checklist
- Launch — and start measuring
Before You Start: What a Real Estate Website Actually Needs
It’s worth being clear about the destination before the first step.
A brochure site needs a homepage, an about page, and a contact form. A real estate website needs all of that, plus a working machine underneath: structured property listings, search that filters the way buyers think, map browsing, agent profiles, and — if you want to improve over time — visibility into which listings people actually view.
Keep that list in mind as you make decisions below. Most regrets in real estate web projects trace back to choosing tools for the brochure and discovering the machine later.
Step 1: Get Hosting and Install WordPress
You need two things to exist on the web: a domain name and hosting.
Domain: short, memorable, and preferably your business name. Skip keyword-stuffed domains (“best-homes-for-sale-dallas.com”) — they look dated and build no brand.
Hosting: any reputable WordPress host works. As your inventory grows, image-heavy listing pages benefit from decent resources, so avoid the absolute cheapest tier. Most hosts install WordPress for you with one click.
Once WordPress is running, you can log in at yourdomain.com/wp-admin. That dashboard is where everything else in this guide happens.
This guide assumes self-hosted WordPress (wordpress.org software on your own hosting), which is the version that supports plugins.
Step 2: Choose Your Stack — Theme and Real Estate Plugin
This is the decision that shapes everything downstream, so it deserves a moment of theory.
A theme controls how your site looks. A plugin adds functionality. The classic mistake in real estate projects is buying a “real estate theme” that bundles both — looks and listings in one package — because when the two are fused, your property data typically lives inside the theme. Change the design later, lose the data. We cover this decision in depth in Real Estate Theme vs Plugin: Which Should Power Your Website?, but the short version:
- Choose any well-built, fast, general-purpose theme you like the look of.
- Add real estate functionality with a dedicated plugin, so your listings survive every redesign.
Havenlytics is built on the plugin side of that divide deliberately. It works with the theme you already have, and your listings, agents, and settings stay independent of your design decisions.
Step 3: Install Havenlytics and Run the Setup Wizard
Install the plugin the standard WordPress way: Plugins → Add New, upload, activate. If you want to try Havenlytics before setting up your own site, you can also open Havenlytics in WordPress Playground and explore it directly in your browser. The Installation & Quick Start guide covers the installation process with screenshots if you’re new to plugins.
On activation, Havenlytics launches its setup wizard. This is worth slowing down for, because the wizard is doing something more important than configuration: it’s making the structural decisions of your site with you — the property setup, the core pages, the initial settings — in one guided pass instead of leaving you to discover a dozen settings screens on your own.
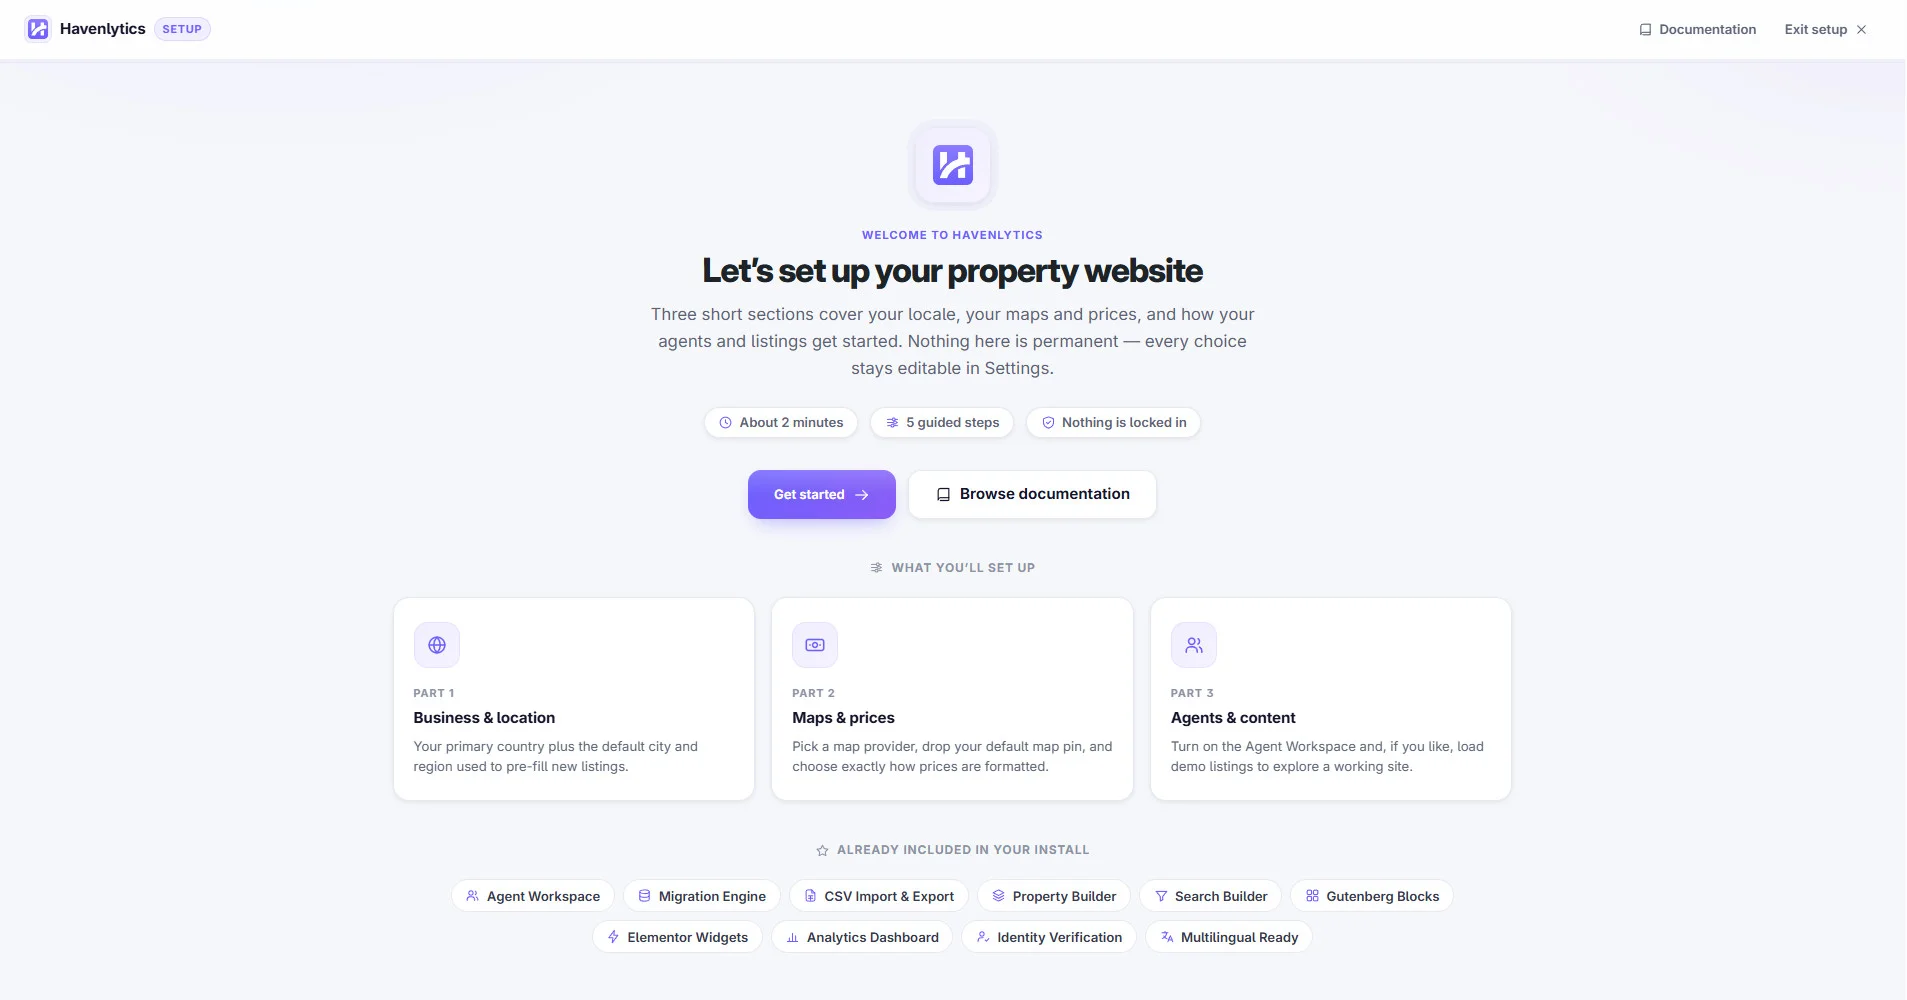
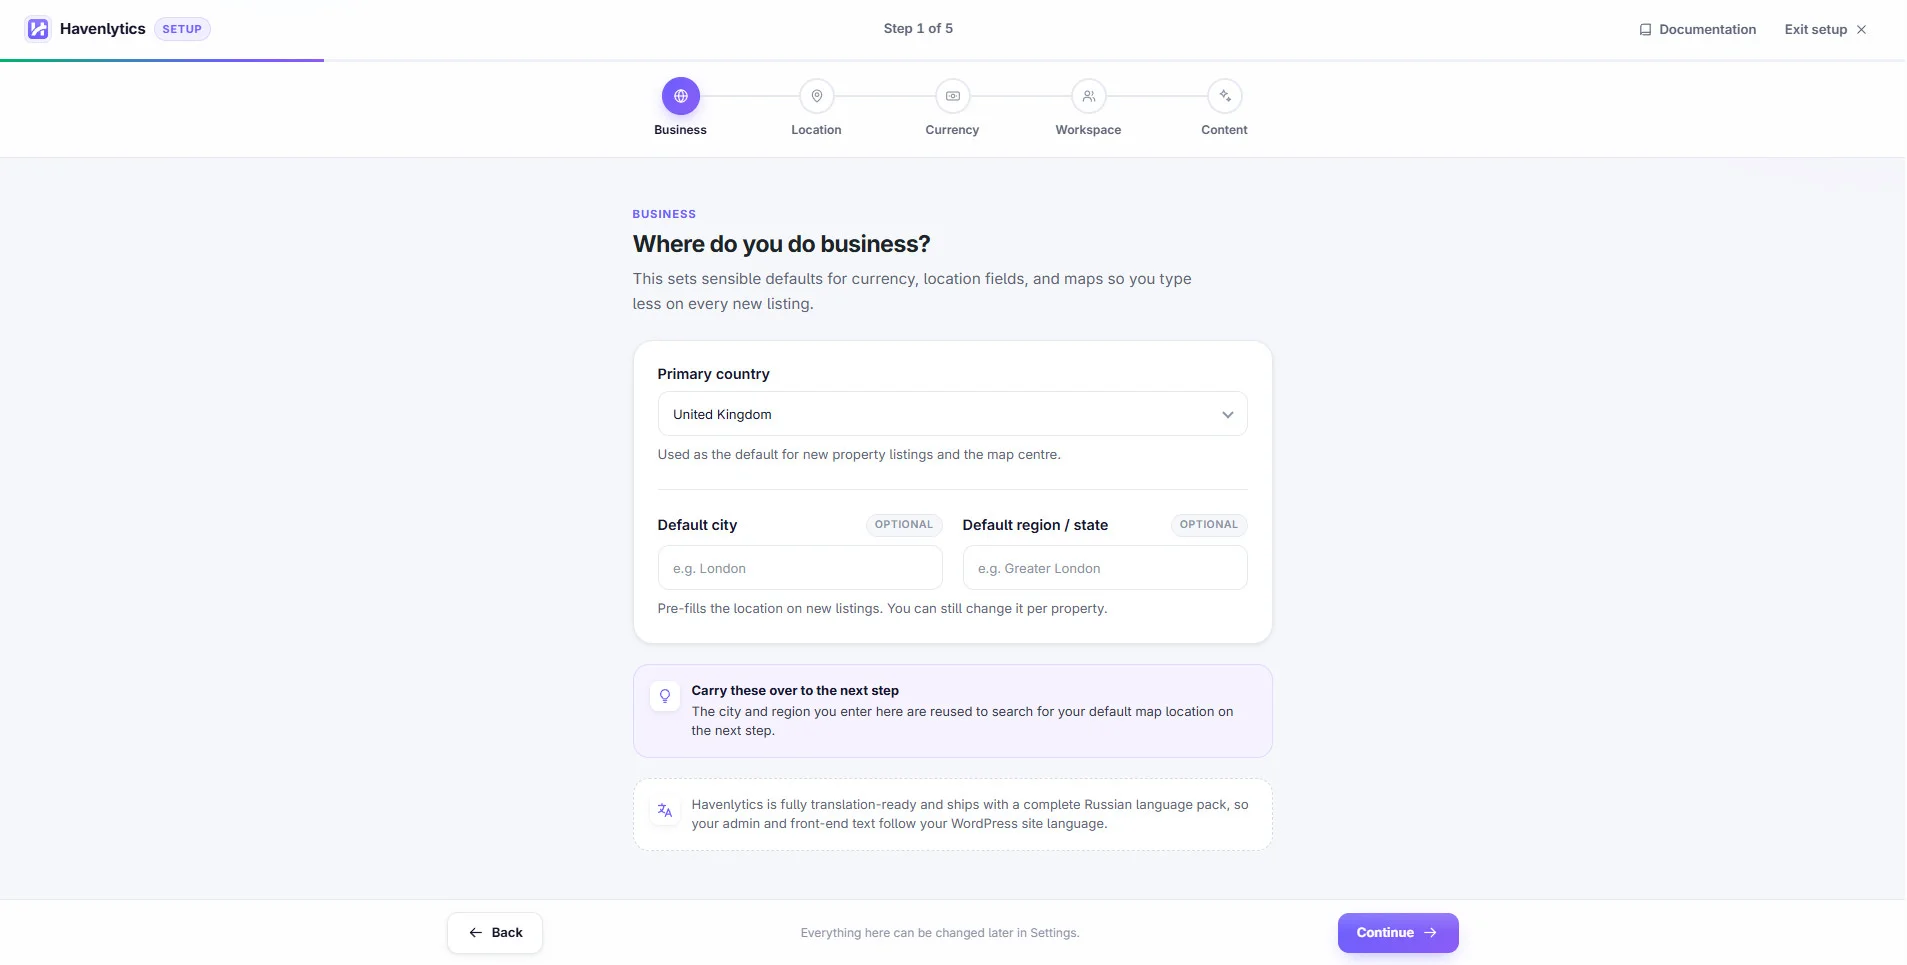
Work through each step and don’t worry about perfection; everything the wizard sets up can be changed later. When it finishes, you have a skeleton site with the real estate machinery in place. The rest of this guide is about putting flesh on it.
Step 4: Plan Your Pages
Before creating content, decide what pages the site needs. For most agent and agency sites, the proven set looks like this:
| Page | Job it does | Priority |
|---|---|---|
| Homepage | Orient visitors and route them to search or featured listings | Essential |
| Property search / listings page | The workhorse — where buyers spend most of their time | Essential |
| Single listing pages | Sell each property; generated automatically from your listings | Essential |
| About | Build trust in you or your agency | Essential |
| Contact | Convert interest into conversation | Essential |
| Agent profiles | Give every agent a credible, personal presence | Team sites |
| Neighborhood / area pages | Local expertise, and your best long-term SEO asset | High value |
| Blog | Market updates and guides that earn search traffic over years | High value |
Two notes on this table.
First, single listing pages aren’t pages you build by hand — Havenlytics generates one for every listing you add, using the layout you’ll design in Step 7. You build the template once; the platform does the rest.
Second, neighborhood pages are the most commonly skipped high-value item. A page for each area you serve, written from real local knowledge, is content no national portal can fake. Plant those seeds early.
Step 5: Model Your Inventory with Taxonomies
Here’s a concept that separates professional real estate sites from amateur ones: before adding listings, decide how listings are organized.
Havenlytics uses property taxonomies for this — the classification system behind your inventory. Out of the box you’ll work with groupings like:
- Property type — house, apartment, condo, land, commercial
- Status — for sale, for rent, sold, pending
- Location — cities, then neighborhoods within them
- Features — pool, garage, garden, waterfront
You can adjust these and add your own groupings to match your market. A vacation-market agency might add “view type”; a commercial specialist might add “zoning.”
Why this matters now rather than later: your search filters (Step 8) are generated from these taxonomies, and so are your area pages. Ten minutes of thought here — what do buyers in my market actually filter by? — pays off across the entire site.
Step 6: Add Your First Listings
With the structure in place, add inventory. Havenlytics gives you three routes:
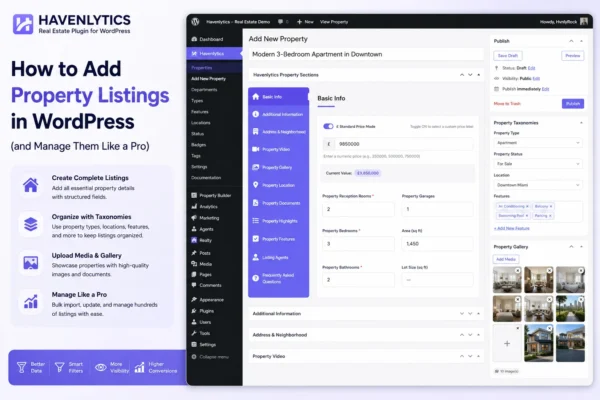
Manually. Create a listing, fill in its fields, assign its taxonomies, upload photos, publish. Best for ongoing, one-at-a-time additions — and worth doing at least once, to learn what the listing editor asks for.
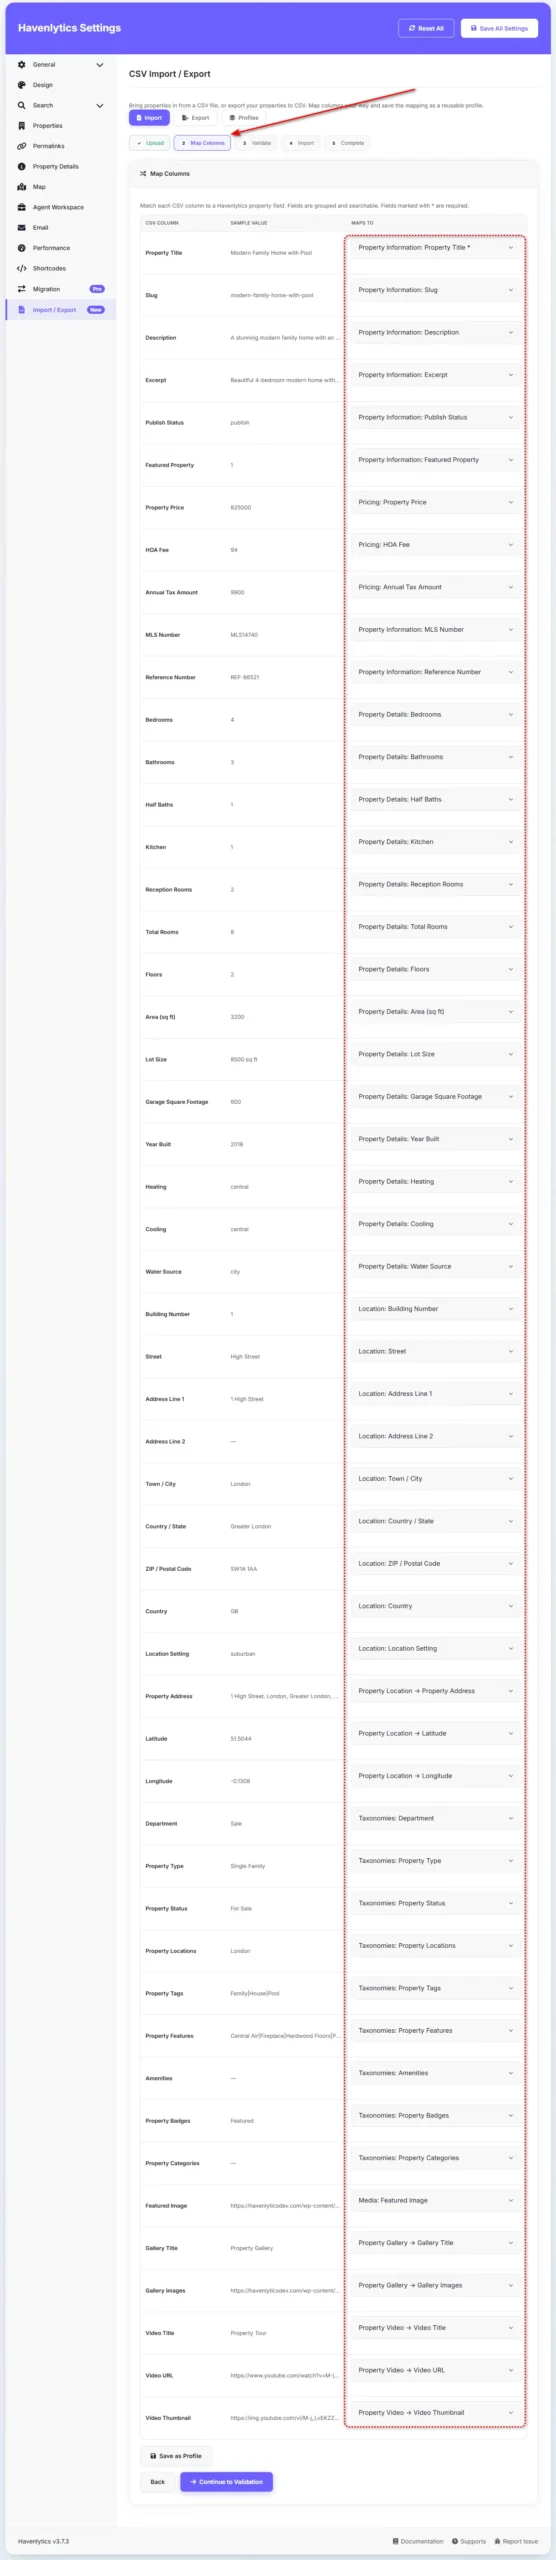
By CSV import. If your inventory lives in a spreadsheet, the CSV import brings it in bulk. Prepare your columns, map them to fields during import, and watch a hundred listings arrive in the time one manual entry takes.
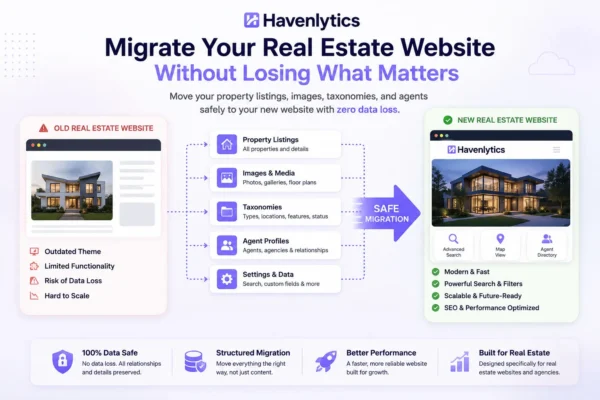
Through CSV Import or the Migration Engine. If your existing inventory can be exported to a supported CSV format, you can map those fields into Havenlytics using CSV Import. If you’re moving an existing Havenlytics site, the Migration Engine transfers your Havenlytics data between Havenlytics installations.
Photos deserve one paragraph of respect: they’re the single strongest factor in how a listing performs. Use the best images you have, lead with the strongest one, and compress before uploading — listing pages carry a lot of images, and page speed matters for both visitors and search rankings.
For the full treatment of listing workflows — statuses, bulk edits, and description writing — see How to Add Property Listings in WordPress: The Complete Guide.
Step 7: Design Your Listing Pages
Every listing now has a page. The Property Builder decides what that page contains.
Open it and you’re choosing which fields appear, in what order, and in what layout — price placement, gallery style, where the map sits, which details show. It’s the same control a developer would give you by editing templates, exposed as settings.
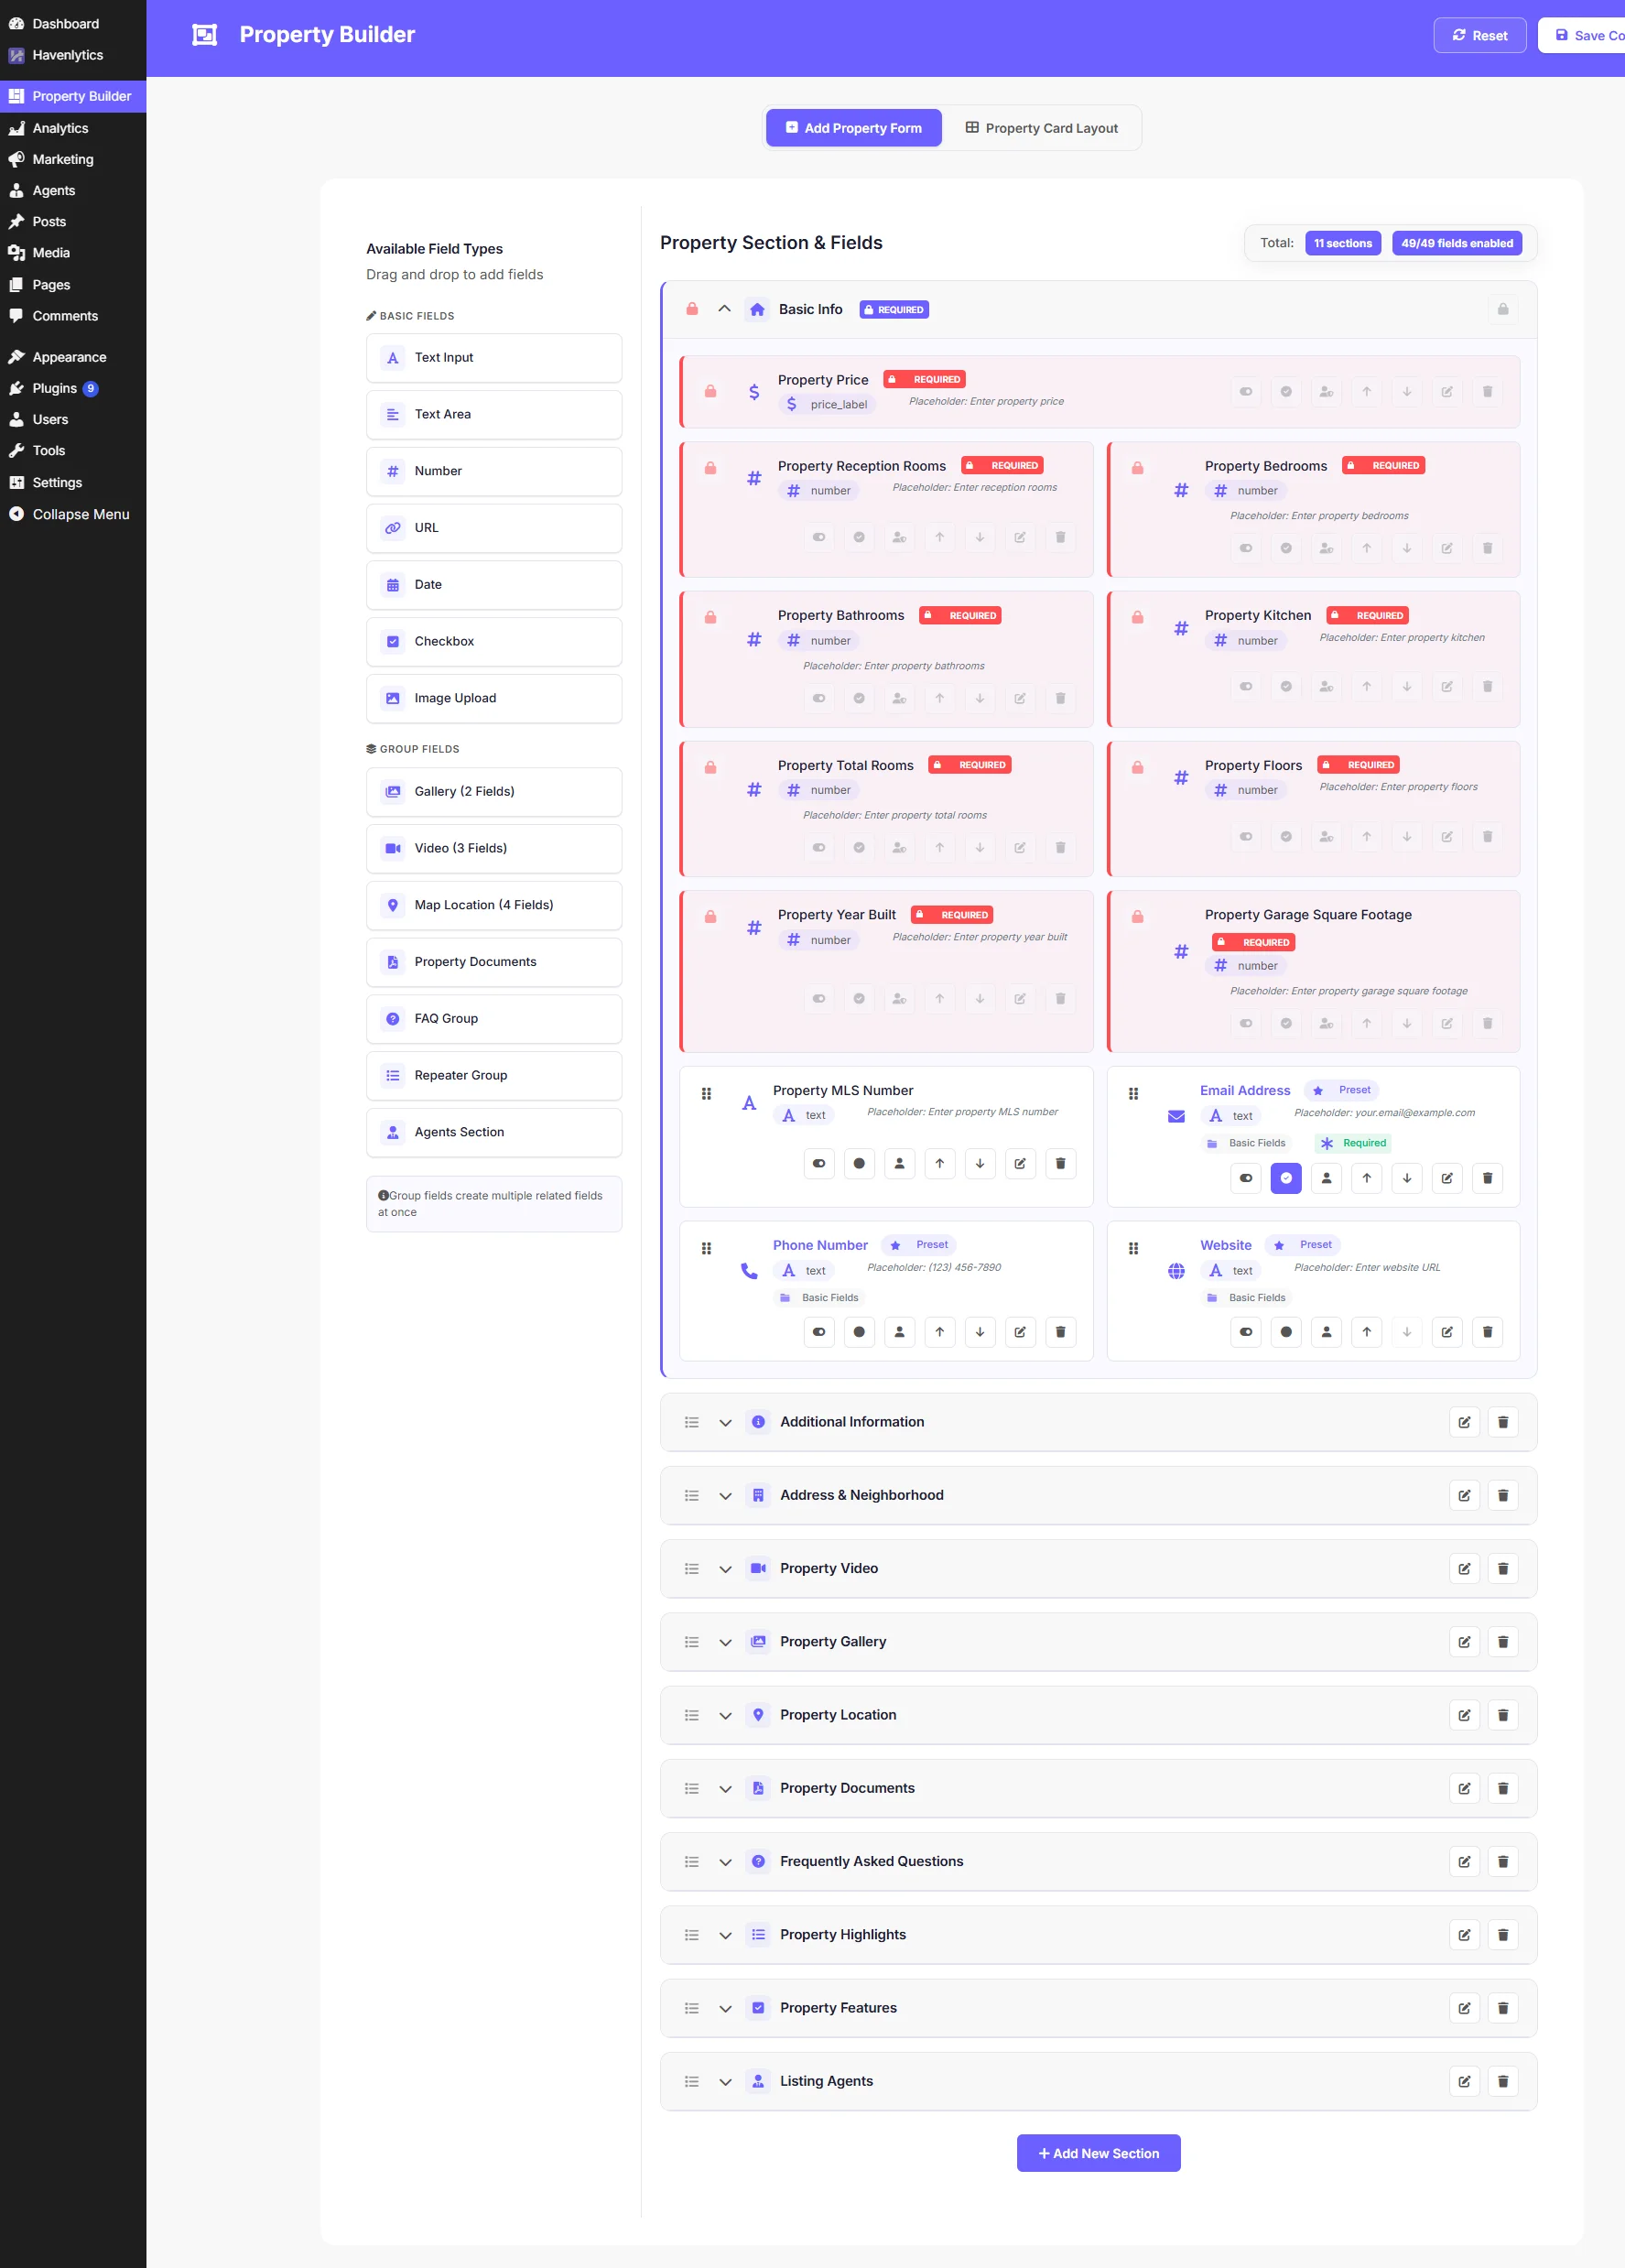
A layout that works almost everywhere: gallery first, price and headline facts immediately after, description next, details table, then map and contact. Buyers scan in that order. Resist the urge to put everything above the fold; a listing page that breathes outperforms one that shouts.
Step 8: Build Your Property Search
Search is where a real estate website earns its keep, and it’s the feature buyers judge you by.
The Search Builder controls the whole experience: which filters appear (drawn from the taxonomies you set up in Step 5), how they behave, and how results display. Start minimal — location, type, status, price, bedrooms — and add filters only when your market genuinely uses them. Every additional filter is friction.
Pair search with interactive maps so visitors can browse geographically. Some buyers think in listings; many think in neighborhoods first, and the map is how they explore. In Havenlytics, maps and search work together — location behaves like any other filter.
We’ll go deeper on search design in the upcoming Property Search That Converts: Filters, Maps & Results Pages Done Right.
Step 9: Add Agents and Structure Your Team
Even a solo agent needs this step — buyers contact people, not websites.
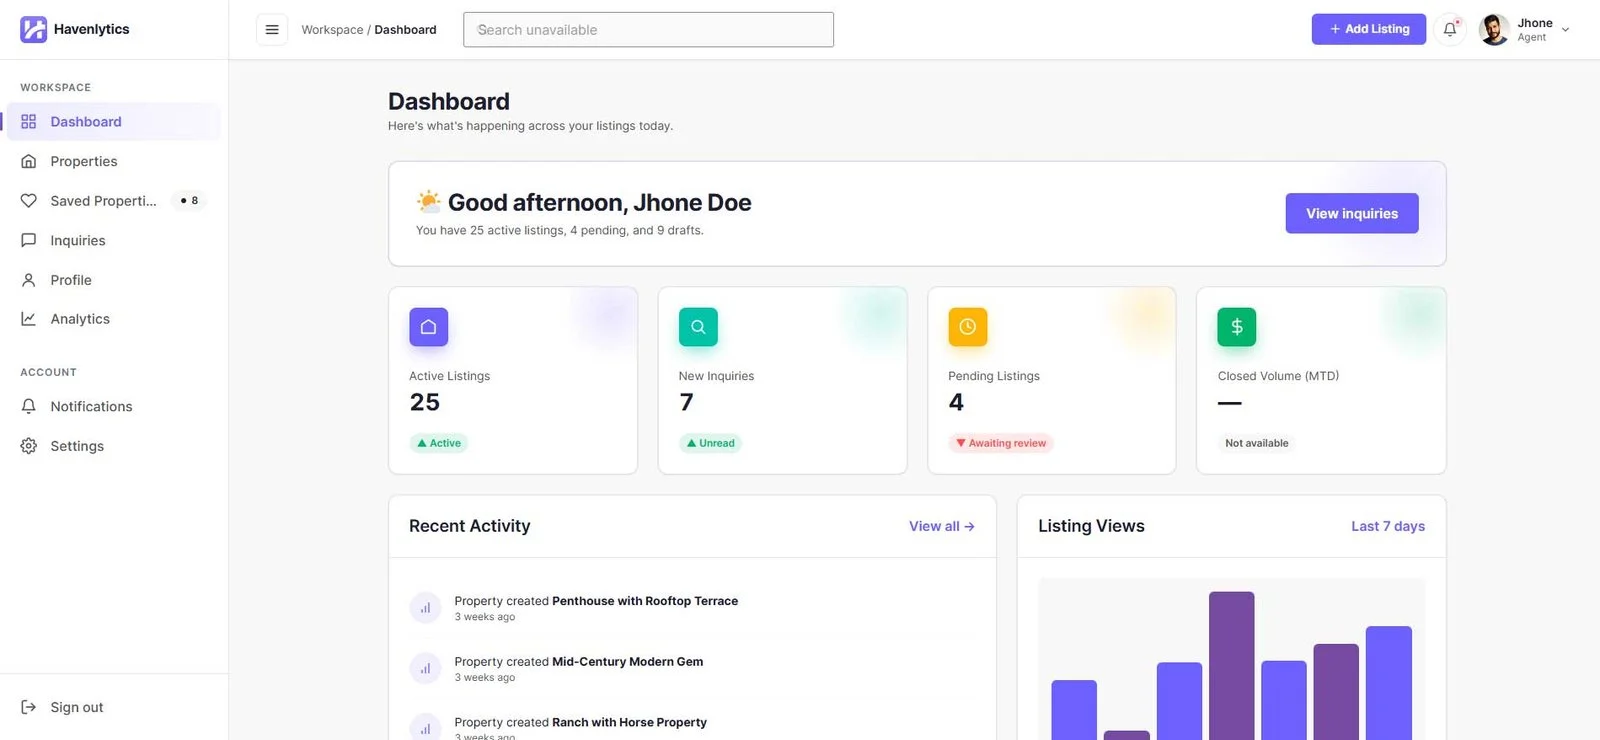
In the Agent Workspace, create a profile for each agent: photo, bio, contact details. Listings are assigned to agents, so every property page shows who to talk to, and every agent profile shows what they represent. If you’re an agency, agency management adds the layer above: agents organized under the agency, roster changes handled without restructuring the site.
Two details that punch above their weight: real photos (stock portraits quietly destroy trust) and identity verification, which Havenlytics supports — a meaningful signal on sites where visitors are deciding whether to contact a stranger.
Step 10: Assemble Your Pages
Now connect everything into the pages you planned in Step 4.
If you use the WordPress block editor, Havenlytics provides native Gutenberg blocks — drop listings, search, and other platform elements into any page and arrange them like ordinary content. If you’re an Elementor user, the same elements ship as Elementor widgets. Either way, no shortcodes to memorize and no template editing.
A homepage that works, in block terms: a clear headline and search bar at the top, a row of featured listings, a short trust section (who you are, what you serve), area links, and a contact call-to-action. Every element on it should route visitors toward search or contact — those are the two destinations that matter.
Step 11: The Pre-Launch Real Estate Website Checklist
Before you announce anything, walk this list:
- Every listing has photos, a price, a status, and an assigned agent
- Search returns sensible results for your five most likely queries
- Maps display correctly and markers open the right listings
- Contact routes work — submit each form and confirm the message arrives
- The site reads well on a phone (most real estate browsing is mobile)
- Pages load fast — compress images, and test on a real mobile connection
- About and contact pages exist and say who you actually are
- Legal pages (privacy policy, and whatever your local regulations require) are in place
- A backup solution is configured — before launch, not after the first mishap
None of these take long. All of them are the difference between “launched” and “launched, then quietly embarrassed.”
Step 12: Launch — and Start Measuring
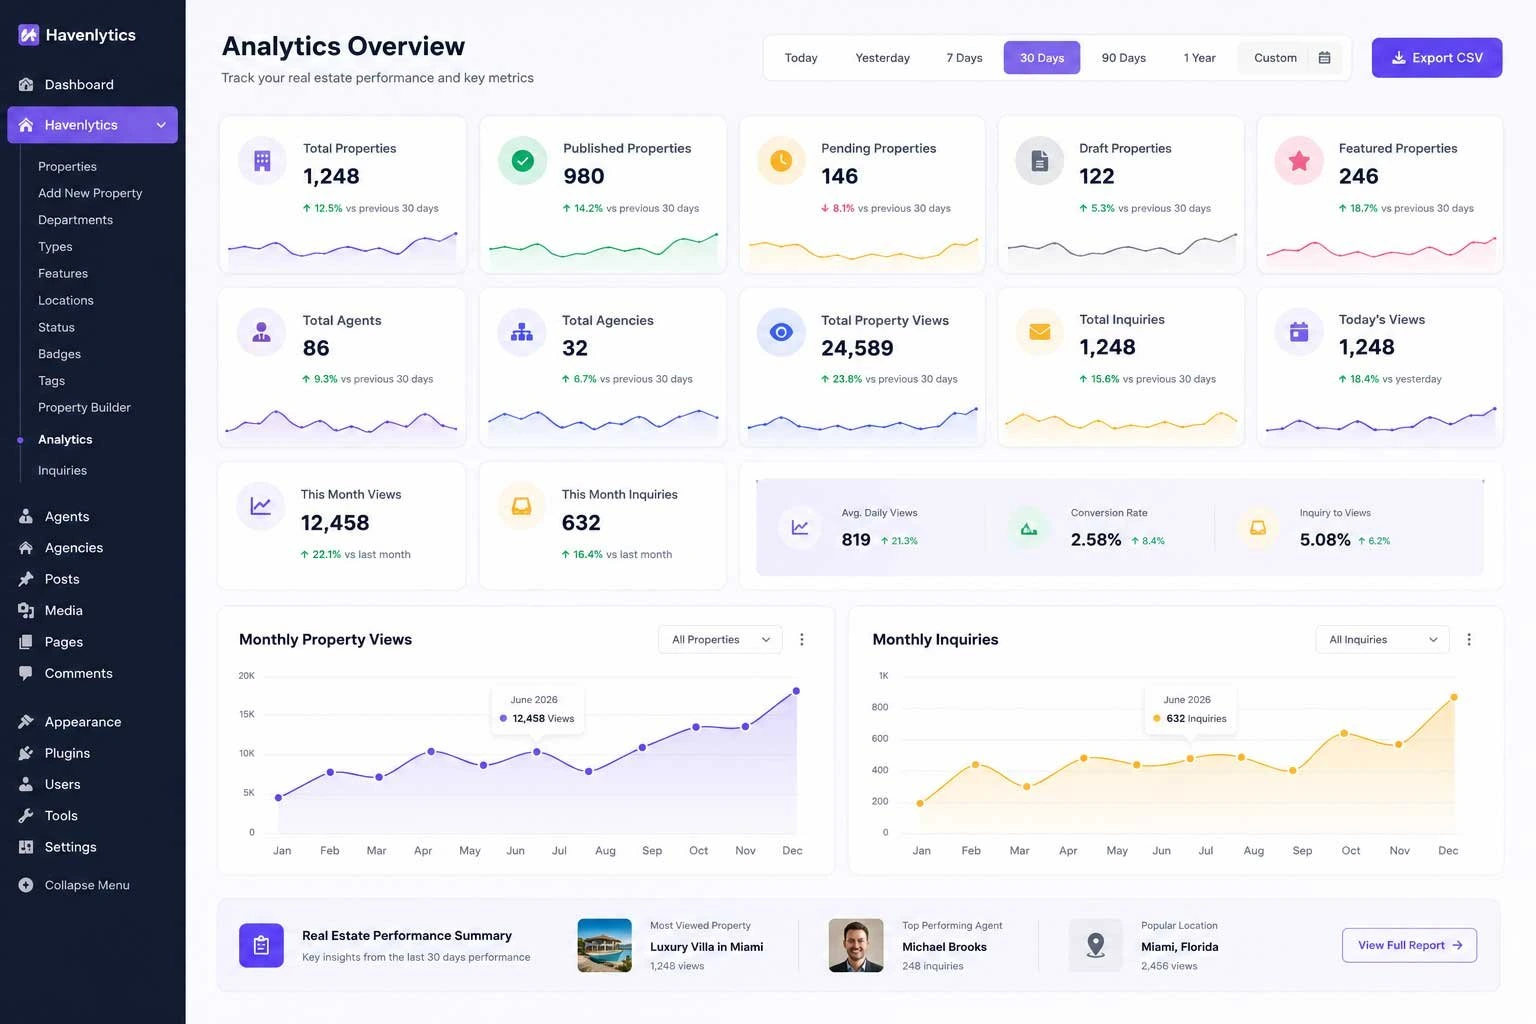
Publish, announce, and then open the part of the platform most site owners never get: the Analytics Dashboard.
From day one, Havenlytics tracks what matters in real estate terms — which properties get viewed, how attention is distributed across your inventory and your team. Generic tools tell you a page got traffic; the dashboard tells you which listing is drawing interest. That’s the feedback loop that turns a website from a brochure into an instrument: you learn what your market responds to and adjust what you feature, write, and photograph.
Give it a few weeks of data before drawing conclusions. Then make it a habit: ten minutes a week reading your own numbers beats any amount of guessing.
What’s Next
You now have the full route from empty hosting account to launched, measurable real estate website. The next guides in this series go deeper on the individual steps:
- Real Estate Theme vs Plugin: Which Should Power Your Website? — the Step 2 decision, examined properly
- How to Add Property Listings in WordPress — listing workflows, bulk imports, and descriptions that sell
- Property Search That Converts — search UX in depth
And if you’re starting from the beginning, the cornerstone overview — Introducing Havenlytics: The Complete WordPress Real Estate Platform — explains how all the pieces you just used fit together as a system.
Conclusion
The intimidating version of this project — custom development, five-figure budgets, months of waiting — is no longer the only option. With WordPress underneath and a real estate platform on top, an agent, agency, or freelancer can build and manage a professional real estate website without starting with a custom development project.
The sequence matters more than speed: structure before listings, listings before design, search before launch, measurement forever after. Follow the twelve steps in order and the site that comes out the other end won’t just look professional — it will work like one.
Ready to start? Install Havenlytics and let the setup wizard walk you through Step 3 — or watch the demo first and see the finished machine before you build your own.
FAQ
Can I build a real estate website myself, without a developer?
Yes. The process in this guide requires no code: WordPress handles the foundation, and the setup wizard, Property Builder, and Search Builder in Havenlytics handle what used to require custom development. A developer becomes useful when you want deep customization — not for getting a professional site launched.
How much does it cost to build a real estate website with WordPress?
Plan for a domain (~$10–20/year), hosting (~$10–30/month), optionally a premium theme, and your real estate plugin license. That total is typically a fraction of agency builds or the recurring cost of hosted site builders — with the added difference that you own the result.
How long does it take?
It depends on your inventory and how much content you write, but the mechanical steps — WordPress, plugin, wizard, pages, search — are measured in hours, not weeks. Importing a large inventory via CSV or the Migration Engine is usually the biggest single task, and it’s a one-time one.
Do I need MLS or IDX access to build a real estate website?
Not necessarily. It depends on your business model: many agency, rental, and directory sites run entirely on their own inventory, added manually, imported by CSV, or submitted by users through frontend submission. If your model depends on displaying MLS feed data, check the current integration options in the Havenlytics documentation before you commit to an approach.
Which WordPress theme should I use with Havenlytics?
Any well-built theme you like. Havenlytics is deliberately theme-independent — listings, search, agents, and analytics work regardless of your design choice, and template overrides are available if you want to customize the markup. Choose your theme for looks and speed, not for real estate features.
Can I move an existing real estate website to this setup?
Yes, depending on the source. If your existing property data can be exported to a supported CSV format, CSV Import can help bring it into Havenlytics. For an existing Havenlytics site, the Migration Engine transfers your Havenlytics data between Havenlytics installations. You may need to review and map fields when importing from another system.