Step-by-step: “Add Property Form“
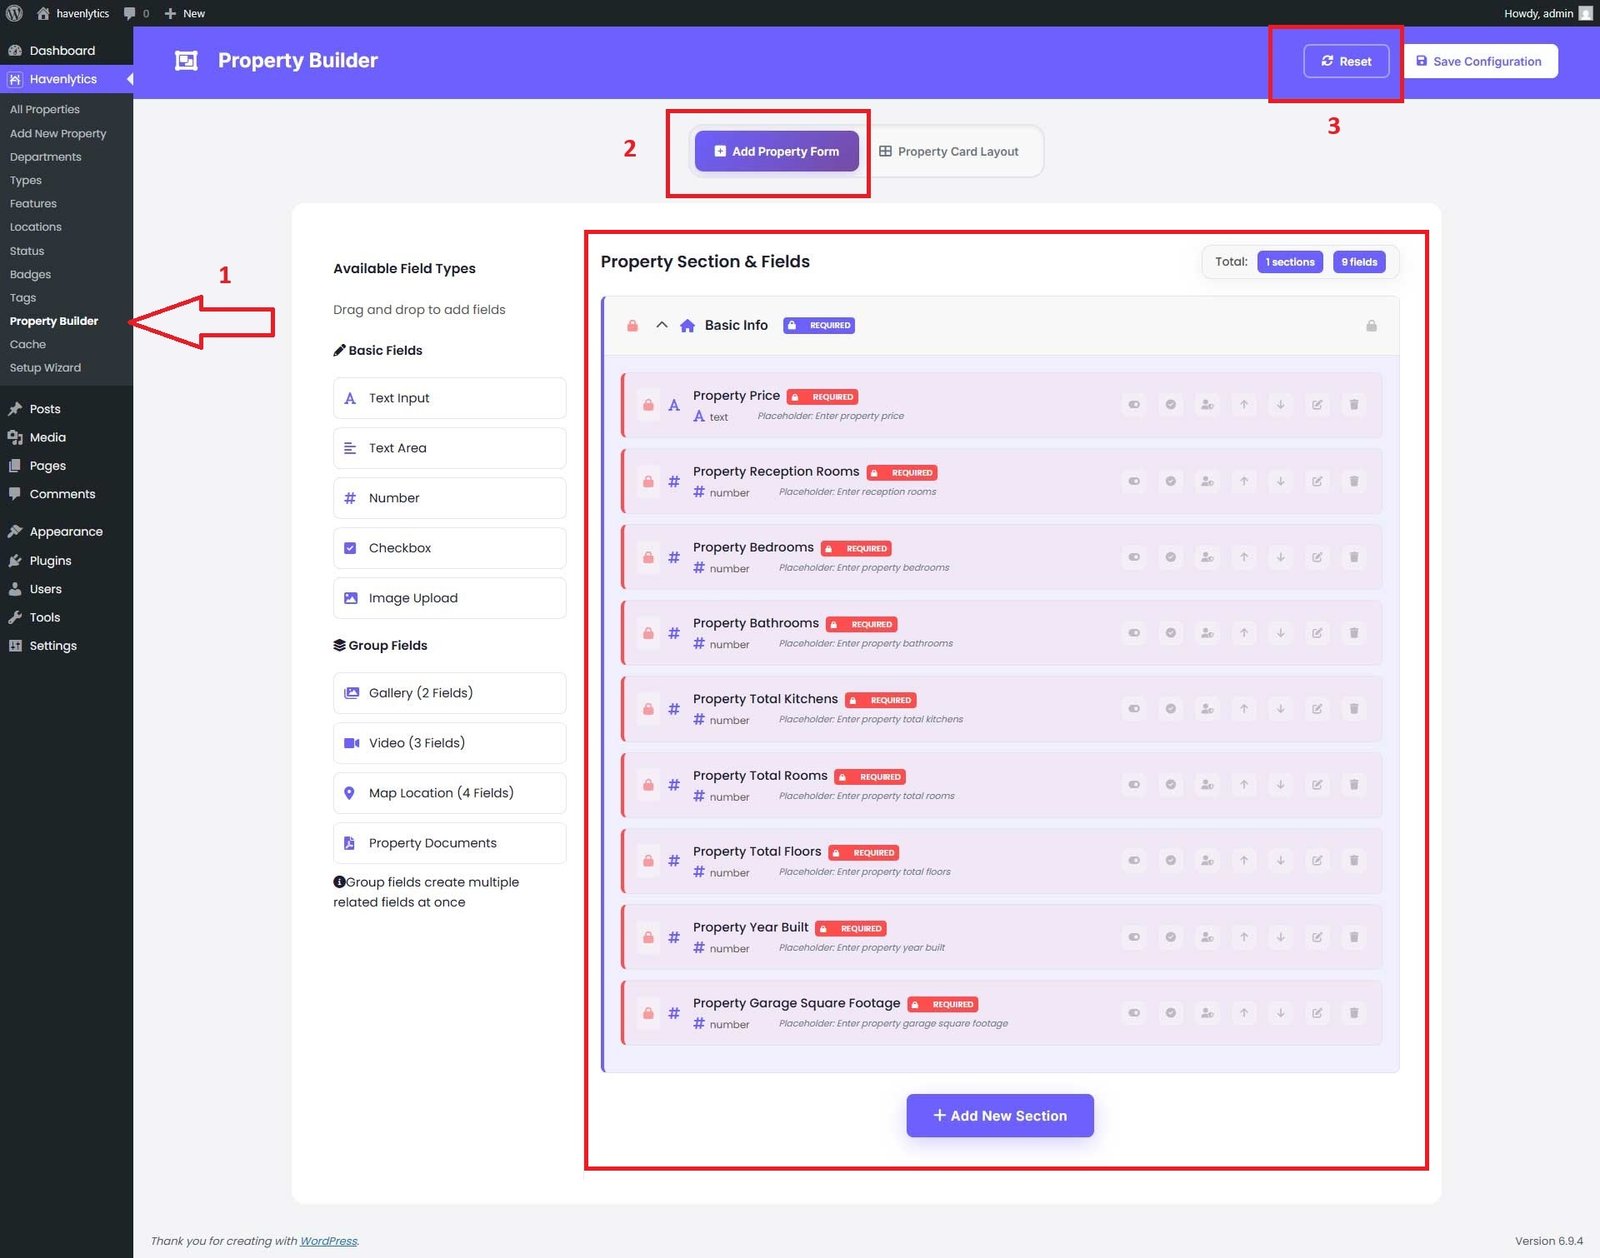
- From the Havenlytics → Property Builder .
- Click on “Add Property Form”
- Click the “Reset” button.
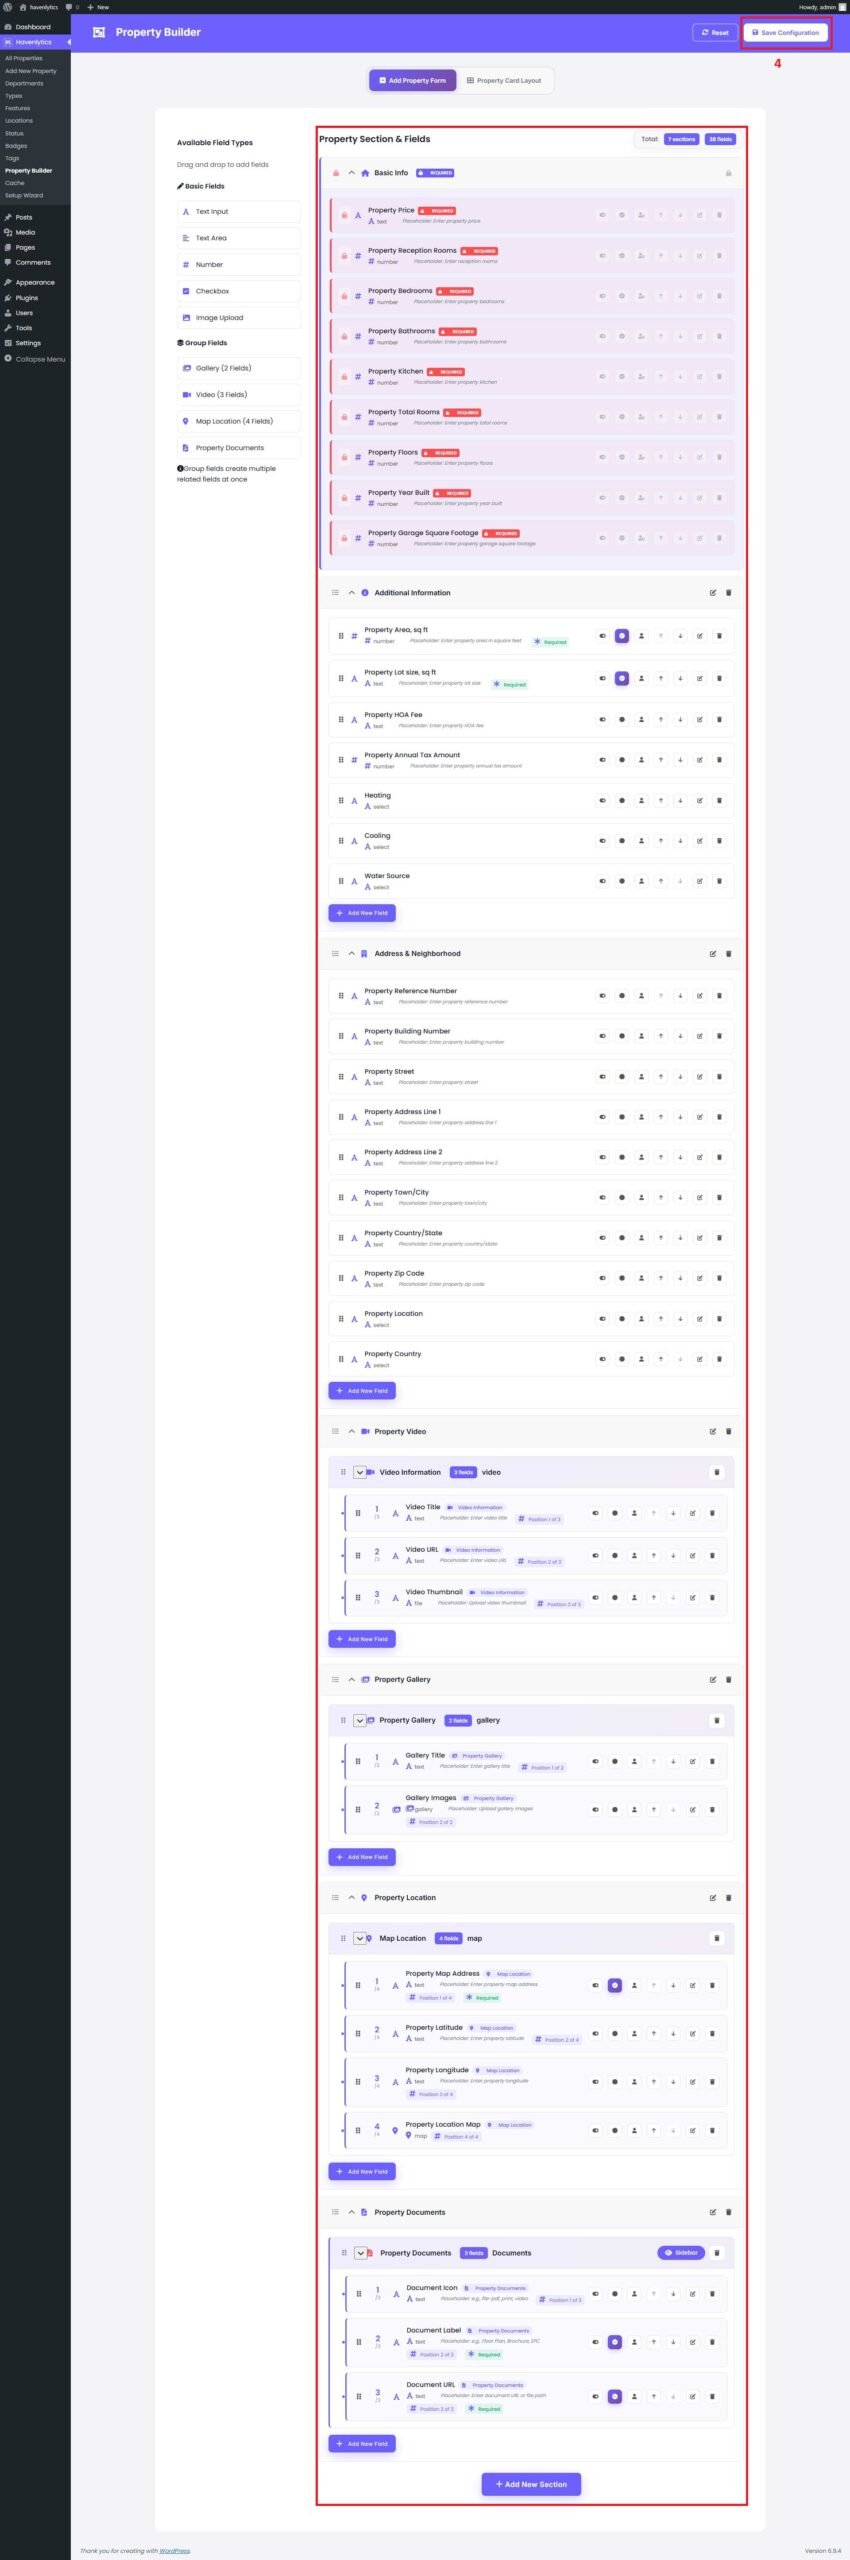
After completing the reset, click the “Save Configuration” button to apply the changes.
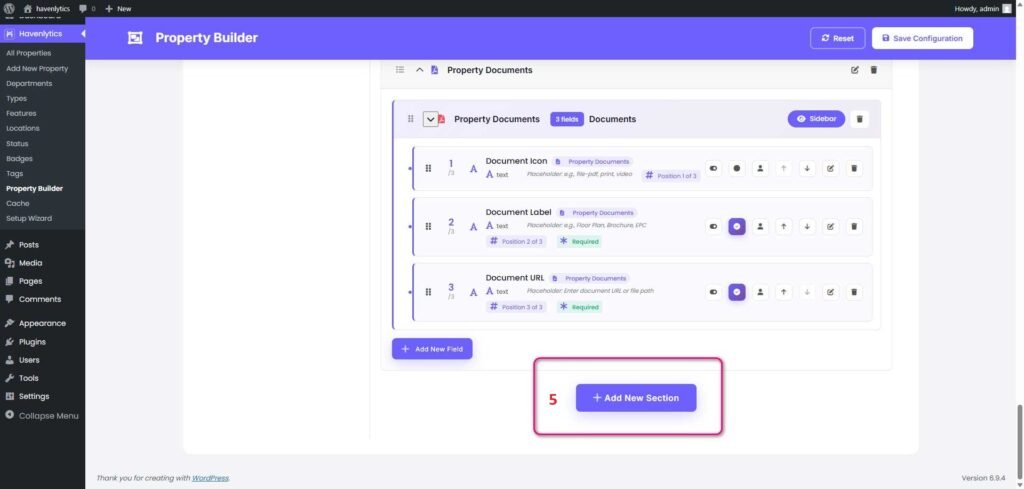
You can now add new sections and fields. Create a new section named “Property Information”, choose a section icon, and then click the “Add Section” button.
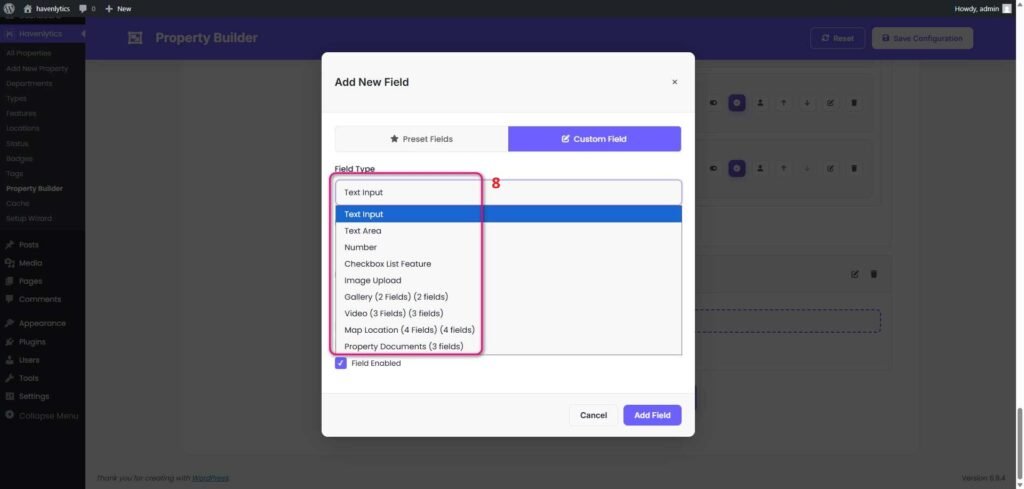
The new section is now ready. To add a field, click “Add New Field.” A popup will appear with a list of available field options.
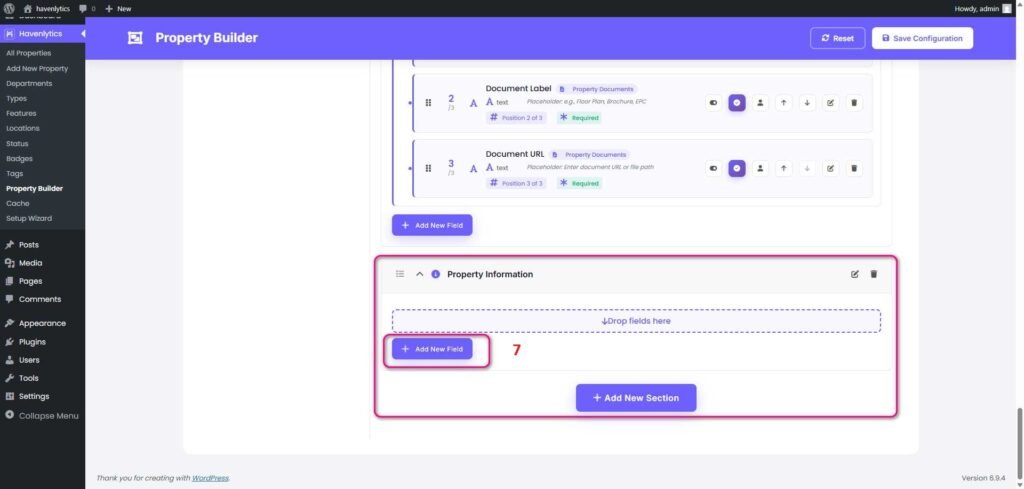
Select a field from the list, then click the “Add Field” button to add it to your section.
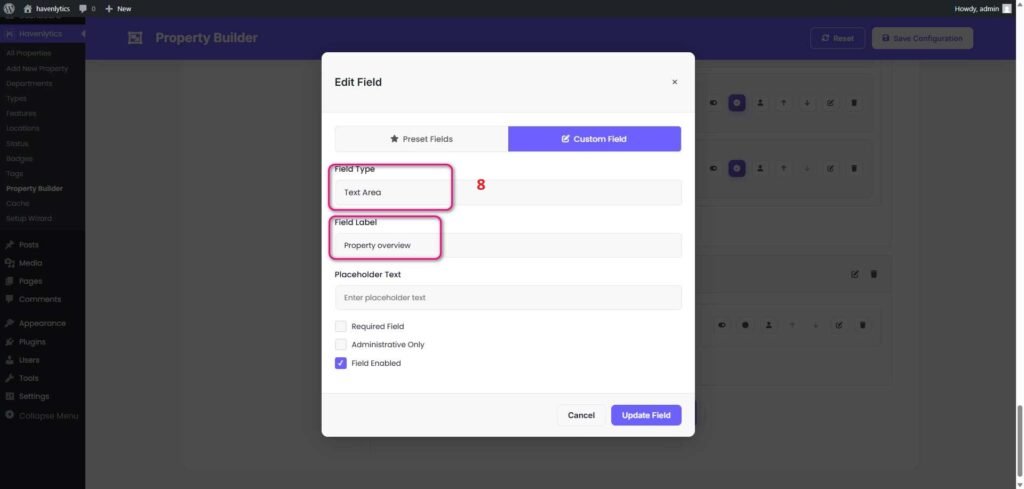
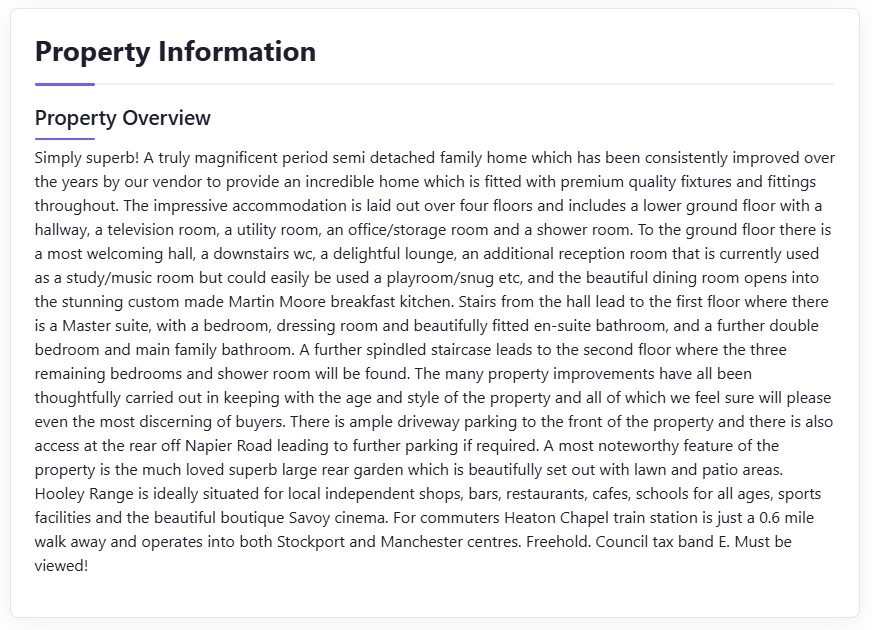
Enter a field placeholder or label name (for example, “Property Overview”), then click the “Add Field” button.
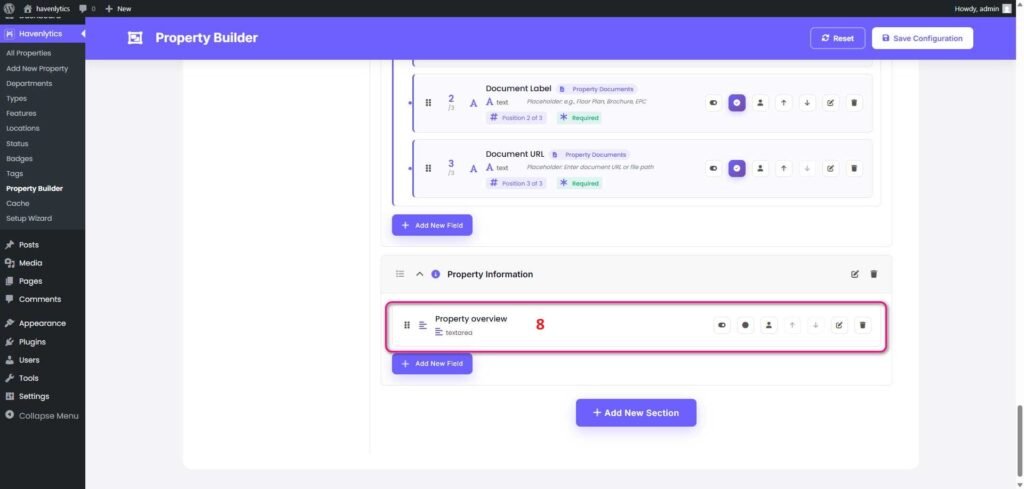
The new field has now been added to the selected section. Finally, click the “Save Configuration” button to save your changes.
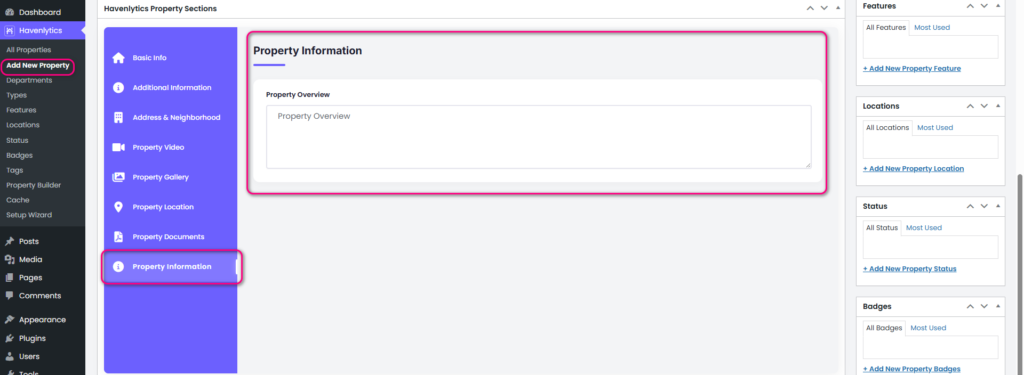
Now go to Havenlytics → Add New Property. You will see the newly created section and fields available in the custom metabox tab area.
Go to any single property page on the frontend to see how your changes are displayed.
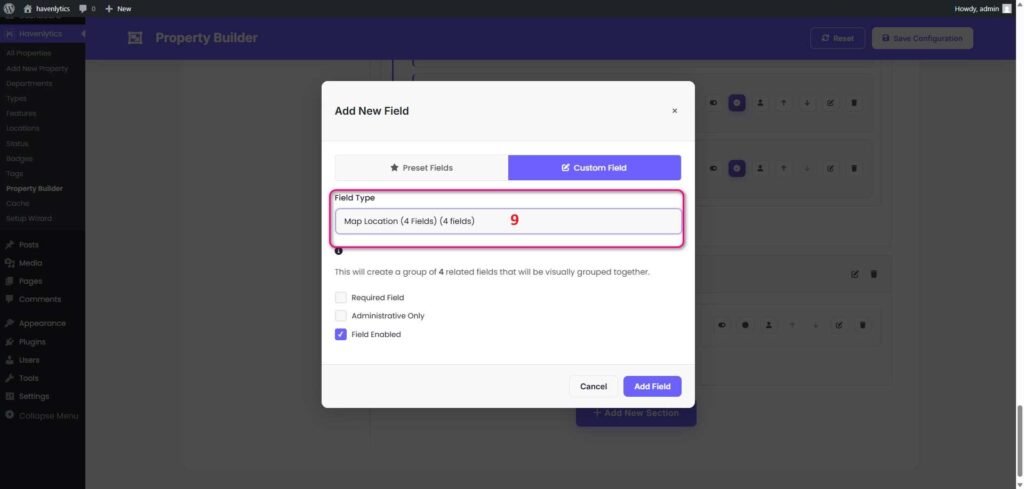
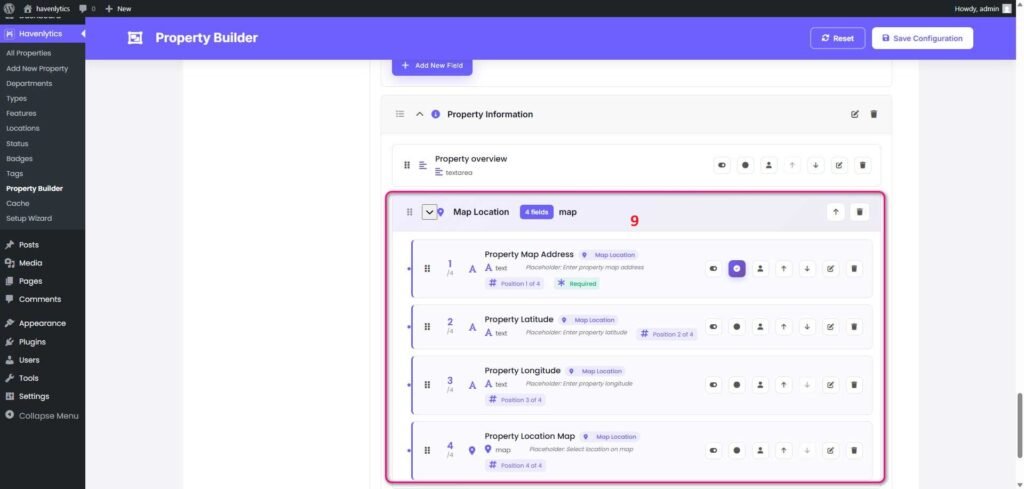
Now we will add a group field. For example, you may have multiple related fields such as Property Map Address, Property Latitude, and Property Longitude. These can be grouped together under a single field called “Map Location.”
Now go to Havenlytics → Add New Property. You will see the newly created section and fields available in the custom metabox tab area.
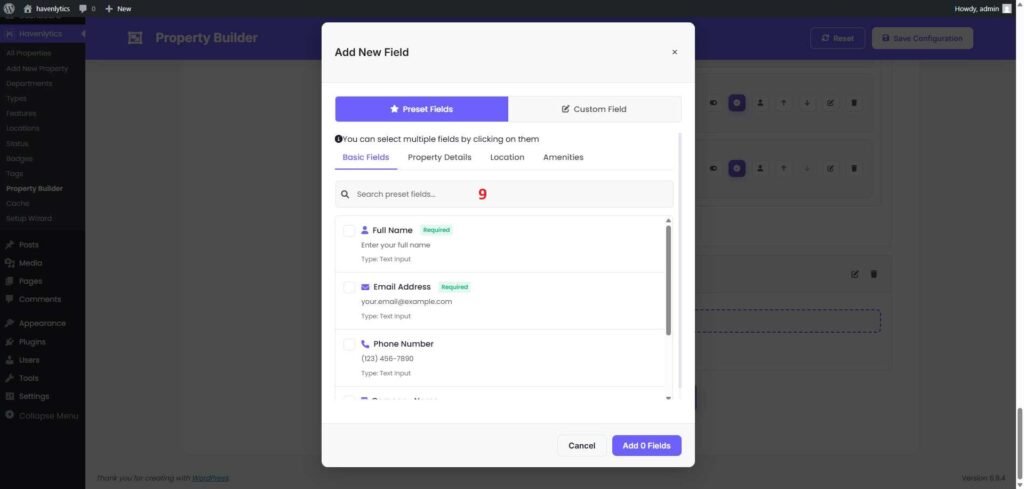
You can also add Preset Fields. These fields have a global name and value, so any value you set will be displayed consistently across all properties.
We will soon release a full video tutorial showing how to use the Property Builder from start to finish on our channel.